> ## Documentation Index
> Fetch the complete documentation index at: https://docs.livingsecurity.com/llms.txt
> Use this file to discover all available pages before exploring further.
# CrowdStrike Falcon 集成设置
> 将 CrowdStrike Falcon 连接到 Living Security,以获取终端检测、恶意软件发现、主机和事件信息。
export const EgressIpAllowlistBothSets = ({system}) =>
{system} 需要两组地址,而不是一组。Living Security 在自有基础设施上生成此集成的访问令牌并持续刷新,因此设置流量和同步流量来自不同的网络。请在 {system} 中将两组地址都加入允许列表,并始终保留这两组地址——这并非仅在设置阶段才需要满足的要求。
集成同步流量——在所有区域中均相同:
52.34.139.153/32, 54.69.127.183/32, 44.247.133.183/32,{' '}
52.26.211.56/32
平台流量——仅使用与贵组织所在区域对应的那一行:
美国:98.91.60.249/32, 13.216.91.102/32
欧盟:34.246.236.210/32, 52.31.102.238/32
如果仅将同步地址组加入允许列表,设置将无法完成。如果仅将平台地址组加入允许列表,设置可以成功,但所有同步都会失败。有关这两种故障的表现和变更策略,请参阅{' '}
配置集成出站 IP 地址
。
;
export const PublicIntegrationNextSteps = () => <>
相关资源
;
# 概述
CrowdStrike Falcon 可提供标准化的终端检测、恶意软件发现、主机上下文和事件活动信息。已审核的示例包括:
* `detection.confirmed` — 检测已确认
* `malware.detected` — 终端恶意软件检测
* `incident.opened` — 事件已创建
请参阅[集成数据如何转化为信号](/zh-Hans/signals/data-sources)。
要通过 CrowdStrike 进行身份验证,您需要:
1. **客户端 ID** - API 客户端的唯一标识符。
2. **客户端密钥** - 用于验证应用程序(客户端)身份的机密密钥。
3. **基本 URL** - 您的 CrowdStrike 云环境的 API 基本 URL。
本指南将引导您在 CrowdStrike 中获取这些凭据。
### 前提条件:
* 您必须具有 CrowdStrike Falcon 控制台的访问权限。
### 操作说明:
#### 步骤 1:创建 API 客户端
1. 登录您的 [CrowdStrike Falcon 控制台](https://falcon.crowdstrike.com/)。
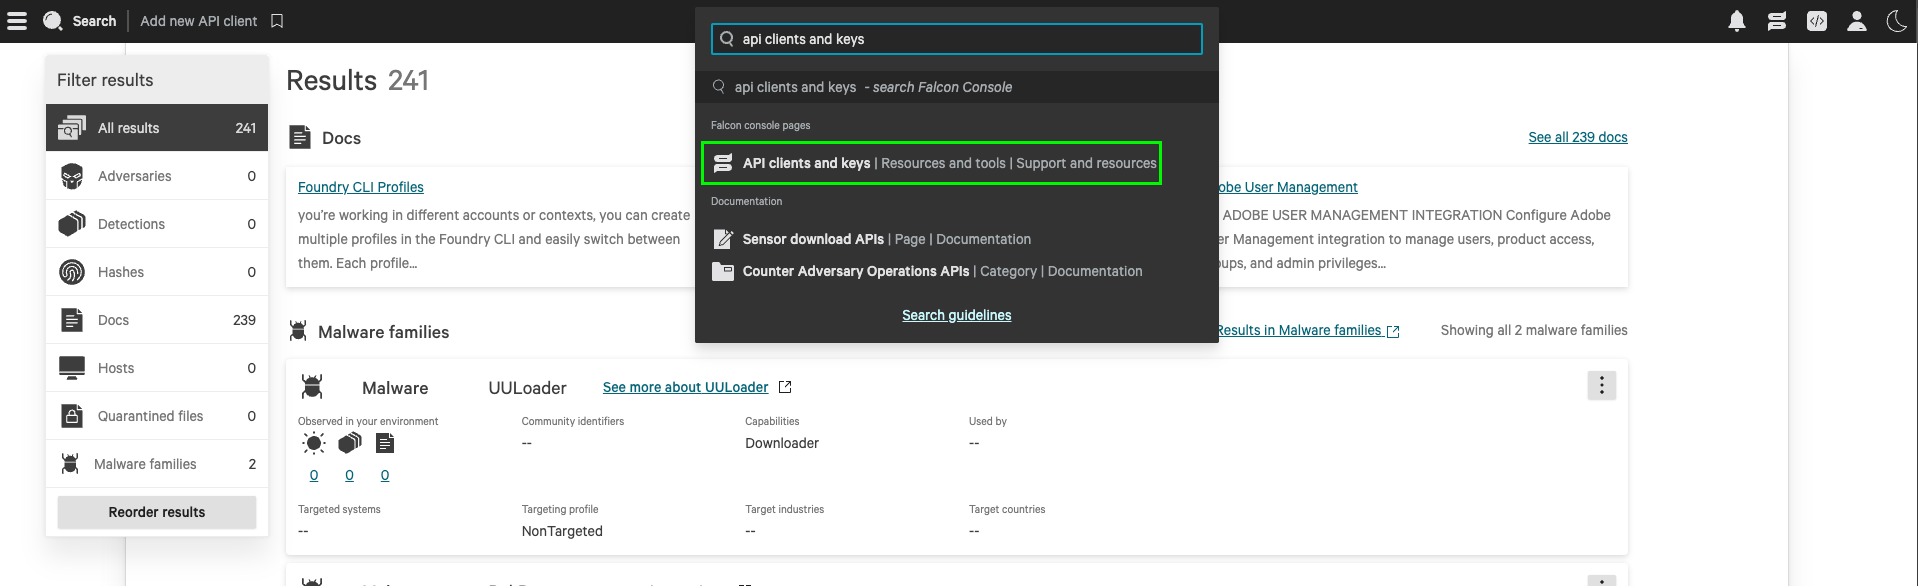
2. 在搜索工具栏中搜索 **API Clients and Keys** 并选择它。
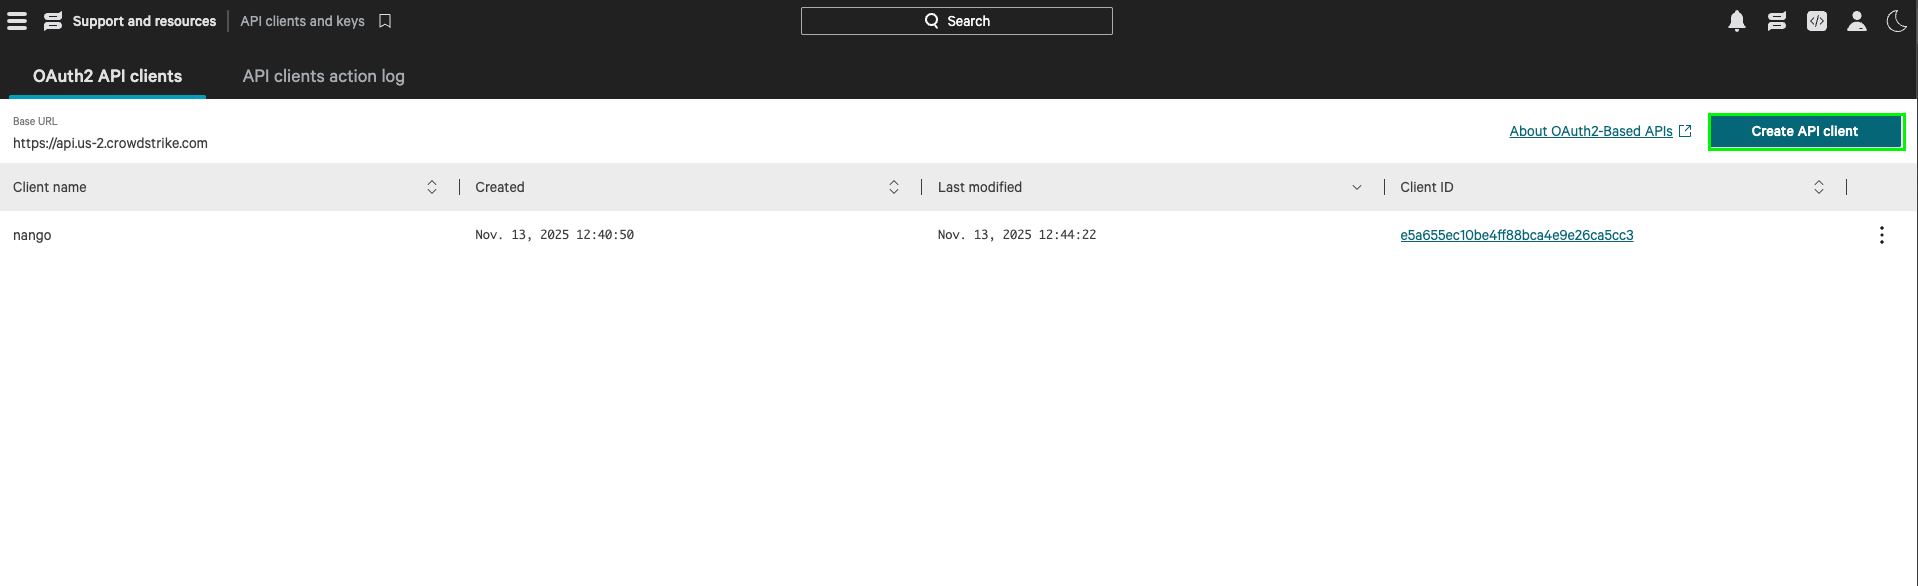
 3. 单击 **Create API Client**。
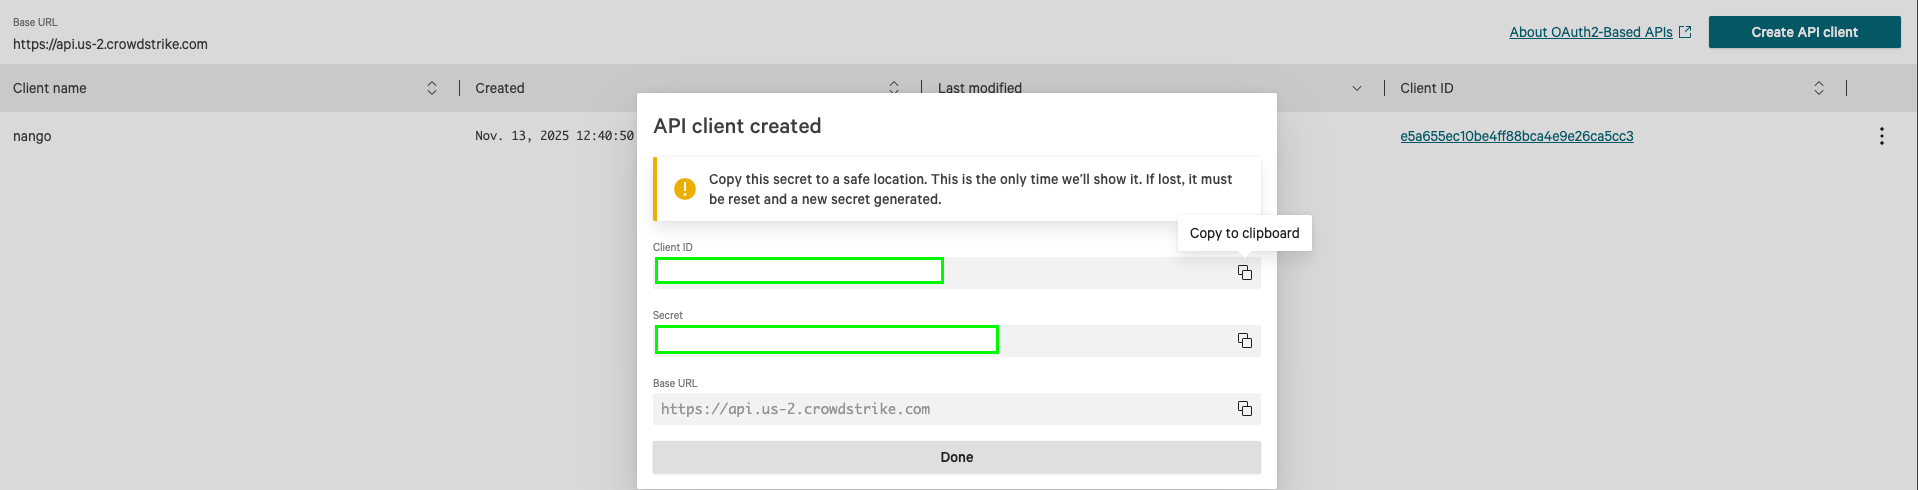
 4. 输入名称和描述,选择 **Alerts: Read** 和 **Hosts: Read** 权限范围,然后单击**创建**。
5. 系统将显示您的**客户端 ID**、**客户端密钥**和**基本 URL**。**基本 URL** 是域名部分(例如 `api.crowdstrike.com`),不含 `https://` 前缀。
4. 输入名称和描述,选择 **Alerts: Read** 和 **Hosts: Read** 权限范围,然后单击**创建**。
5. 系统将显示您的**客户端 ID**、**客户端密钥**和**基本 URL**。**基本 URL** 是域名部分(例如 `api.crowdstrike.com`),不含 `https://` 前缀。
 #### 步骤 2:在 Living Security Platform 中输入凭据
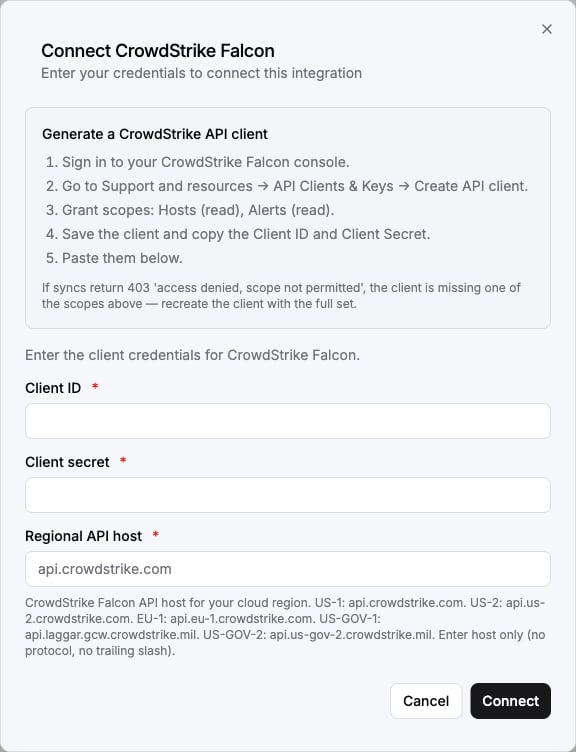
获得**客户端 ID**、**客户端密钥**和**基本 URL** 后:
1. 打开需要通过 CrowdStrike 进行身份验证的表单。
2. 在相应字段中输入您的**基本 URL**、**客户端 ID** 和**客户端密钥**。
3. 提交表单,即可成功通过身份验证。
#### 步骤 2:在 Living Security Platform 中输入凭据
获得**客户端 ID**、**客户端密钥**和**基本 URL** 后:
1. 打开需要通过 CrowdStrike 进行身份验证的表单。
2. 在相应字段中输入您的**基本 URL**、**客户端 ID** 和**客户端密钥**。
3. 提交表单,即可成功通过身份验证。
 您现已连接到 CrowdStrike。
***
本文档的部分内容改编自 [Nango](https://nango.dev/docs/),并依据 [Elastic License 2.0](https://github.com/NangoHQ/nango?tab=License-1-ov-file#readme) 使用。
## 网络访问
除非您的 Falcon 租户按源 IP 地址限制 API 访问,否则请跳过本节。大多数租户没有此限制。
This documentation is built and hosted on [Mintlify](https://mintlify.com), a developer documentation platform.
您现已连接到 CrowdStrike。
***
本文档的部分内容改编自 [Nango](https://nango.dev/docs/),并依据 [Elastic License 2.0](https://github.com/NangoHQ/nango?tab=License-1-ov-file#readme) 使用。
## 网络访问
除非您的 Falcon 租户按源 IP 地址限制 API 访问,否则请跳过本节。大多数租户没有此限制。
This documentation is built and hosted on [Mintlify](https://mintlify.com), a developer documentation platform.