

What Living Security needs
Scopes:
okta.users.read okta.logs.read — okta.users.read backs the users sync and okta.logs.read backs the system log sync; both are required.
Required role: Super Administrator in Okta (to create apps and assign admin roles)
Prerequisites
- You must have Super Administrator access in Okta to create API Services applications and assign administrator roles.
Part A — In Okta
Your Okta administrator completes these steps.1
Create an API Services application
- Log in to your Okta Admin Console.
- In the left sidebar, navigate to Applications → Applications.
- Click Create App Integration.
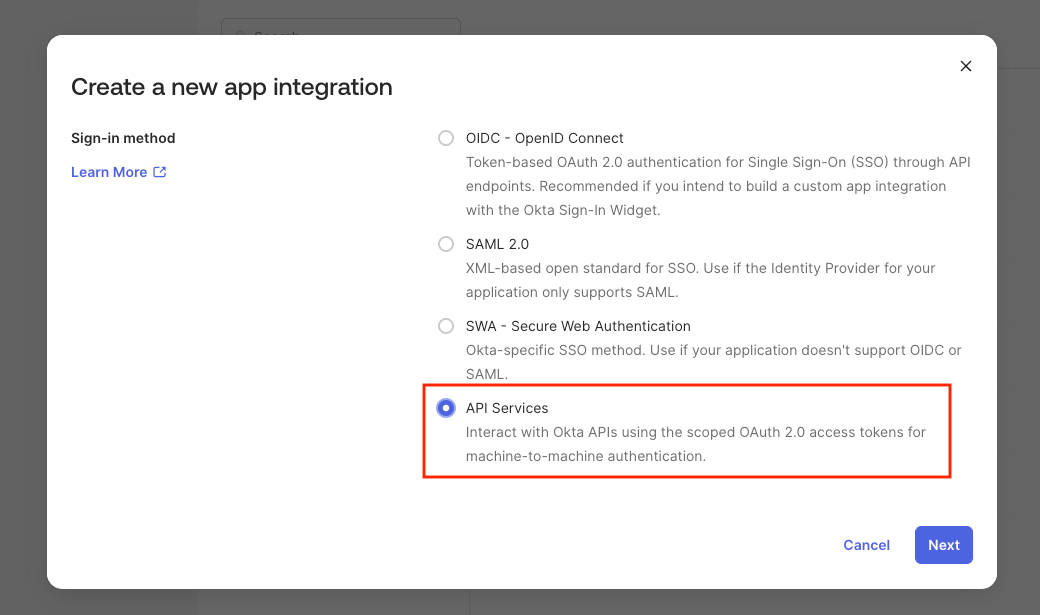
- Select API Services as the sign-in method and click Next.
- Give your application a name (e.g.,
Living Security) and click Save. - On the application’s General tab, find your Client ID — you’ll need it in Part B.
2
Configure public key authentication
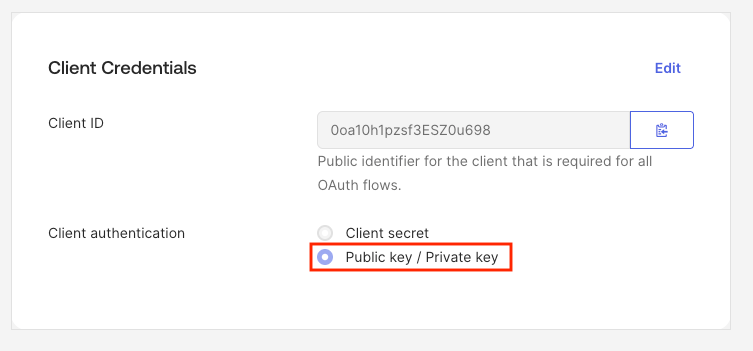
- On the General tab, set Client authentication to Public key / Private key.
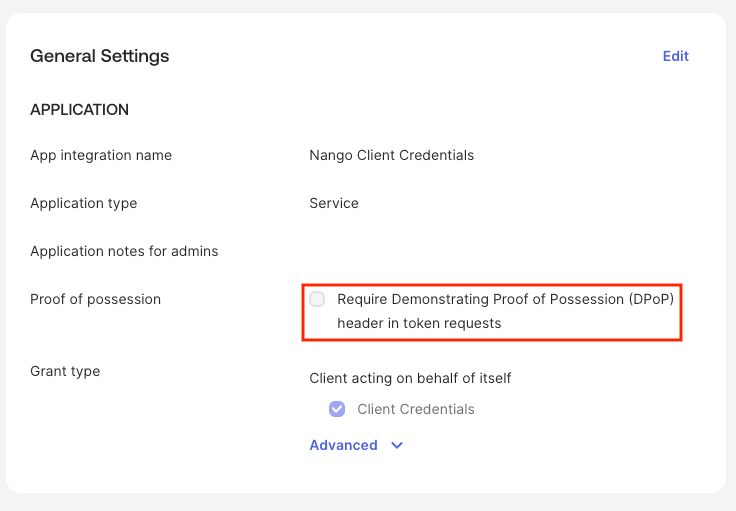
- Disable Proof of possession (DPoP) — it is not supported.
The application must use Public key / Private key authentication.
okta.* scopes are only supported with this authentication method.3
Generate and register the RSA key pair
Option A: Use Okta’s key generator (recommended)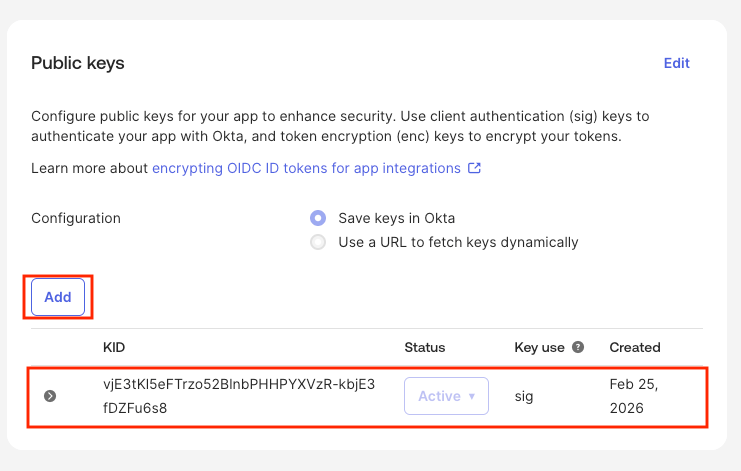
- On the General tab, scroll to the PUBLIC KEYS section.
- Click Add Key, then select Generate new key.
- Click Save — Okta generates the key pair and displays the Private Key (JWK) once.
- Copy and save the private key JSON immediately — it will not be shown again.
- On the General tab, scroll to the PUBLIC KEYS section.
- Click Add Key, paste the public JWK JSON, and click Save.
4
Find your Okta Domain
Your Okta Domain is the subdomain of your Okta organization URL:
- In the Admin Console, your browser shows a URL like
https://dev-12345678-admin.okta.com - Your Okta Domain is the part before
.okta.com, ignoring-admin(e.g.,dev-12345678) - Alternatively, go to Settings → Account in the Admin Console
5
Grant API scopes
- In the Admin Console, navigate to Applications → Applications and open your application.
- Click the Okta API Scopes tab.
- Grant the required scopes:
okta.users.readokta.logs.read
6
Assign an admin role
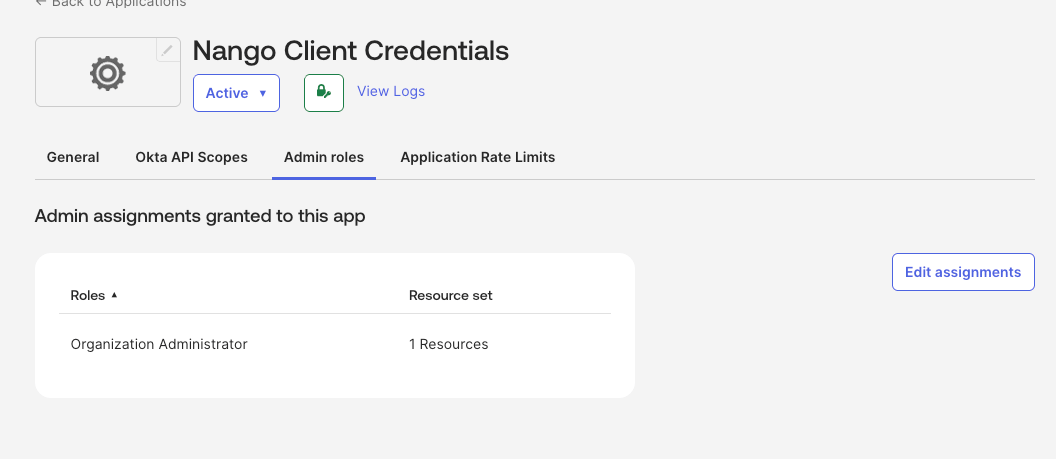
Granting scopes alone is not enough — Okta Management API endpoints silently return empty results if your application has no admin role. You must assign at least Read-Only Administrator: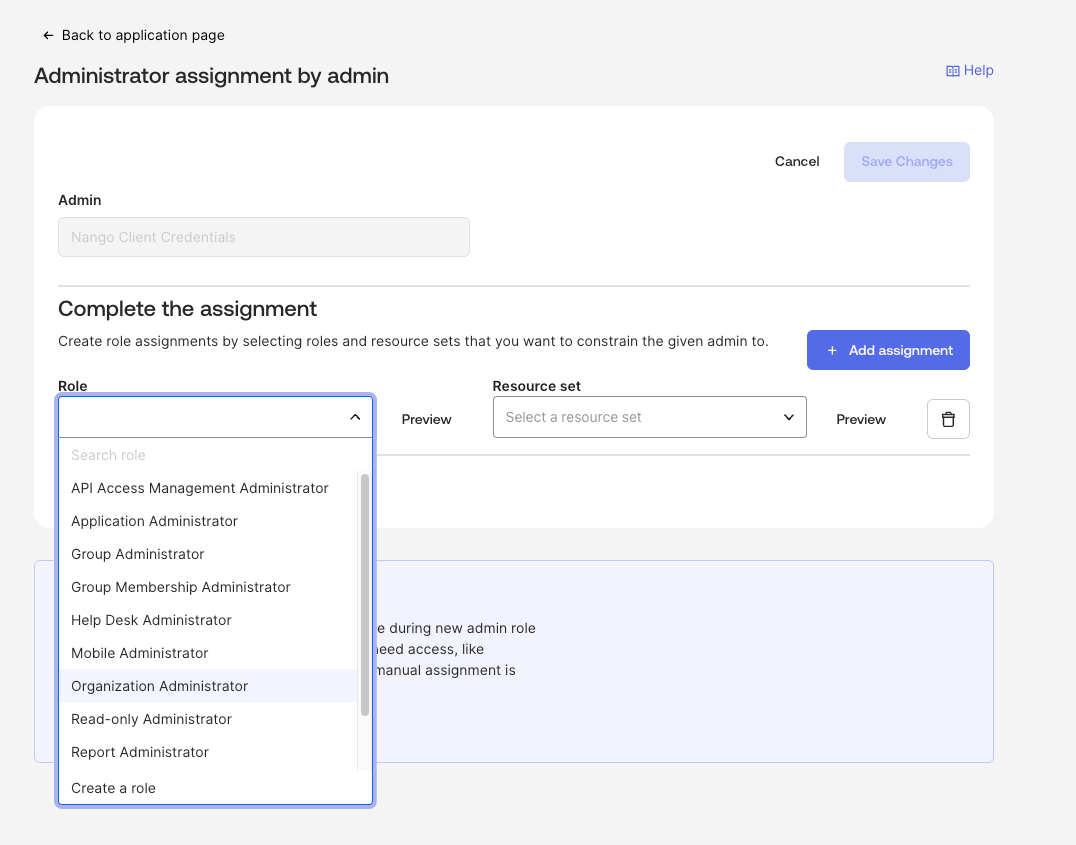
- In the Admin Console, navigate to Security → Administrators.
- Click Add administrator assignment and select your API Services application.
- Assign the Read-Only Administrator role.
- Click Save.
Part B — In the Living Security Platform
The program owner completes this step, or the system admin if using delegated setup.1
Troubleshooting
Empty results (200 OK but no users returned)
Empty results (200 OK but no users returned)
The application is missing an admin role assignment. Okta Management API endpoints return empty arrays instead of errors when the application lacks permissions.Fix: Assign at least Read-Only Administrator to the application in Security → Administrators.
403 Forbidden or insufficient_scope
403 Forbidden or insufficient_scope
The application is missing required scopes. Verify that
okta.users.read and okta.logs.read are granted in Applications → [Your App] → Okta API Scopes.Invalid DPoP proof
Invalid DPoP proof
DPoP (Demonstrating Proof of Possession) is enabled but not supported. Disable DPoP in the application’s General settings.
Portions of this documentation are adapted from Nango, used under the Elastic License 2.0.