> ## Documentation Index
> Fetch the complete documentation index at: https://docs.livingsecurity.com/llms.txt
> Use this file to discover all available pages before exploring further.
# Auth0
> Connect Auth0 to Living Security for user, authentication, MFA, and administrative activity.
export const EgressIpAllowlistBothSets = ({system}) =>
{system} needs two sets of addresses, not one. Living Security mints this
integration's access token on its own infrastructure and refreshes it continuously, so setup
traffic and sync traffic leave from different networks. Allowlist both sets in {system}, and
keep both in place — this is not a setup-only requirement.
Integration sync traffic — the same in every region:
52.34.139.153/32, 54.69.127.183/32, 44.247.133.183/32,{' '}
52.26.211.56/32
Platform traffic — use only the row for the region that hosts your
organization:
United States: 98.91.60.249/32, 13.216.91.102/32
European Union: 34.246.236.210/32, 52.31.102.238/32
Allowlist only the sync set and setup never completes. Allowlist only the platform set and
setup succeeds while every sync fails. See{' '}
Configuring Integration Egress IP Addresses
{' '}
for both failure signatures and the change policy.
;
export const PublicIntegrationNextSteps = () => <>
Related resources
;
## Overview
Auth0 can contribute normalized user, authentication, MFA, and administrative activity. Reviewed examples include:
* `auth.login.failed` — fails to log in
* `mfa.failed` — fails MFA challenges
* `auth.login.blocked` — login blocked
See [how integration data becomes signals](/signals/data-sources).
To authenticate with Auth0 (Client Credentials), you need one key piece of information:
1. **Client ID** - A unique identifier for your client.
2. **Client Secret** - A confidential key used to authenticate the identity of the application (client).
3. **HostName** - The domain associated with your Auth0 tenant.
4. **Audience** - The audience for the token, which is your API.
5. **Organization** - The organization name or identifier you want the request to be associated with.
This guide will walk you through finding or generating these credentials within Auth0.
### Prerequisites:
* You must have an Auth0 account.
#### Step 1: Finding Your Client Credentials
1. Log in to your [Auth0](https://auth0.com/docs/authenticate/login) account.
2. Navigate to the [Application's Settings](https://manage.auth0.com/?_gl=1*1shsko2*_gcl_au*MzYwMDE4ODE4LjE3NDU5OTY3NDA.*_ga*NTkyOTQ4NzA5LjE3NDU5OTY3NDE.*_ga_QKMSDV5369*MTc0NTk5Njc0MC4xLjEuMTc0NTk5OTI5My42MC4wLjA.#/applications) page.
3. Click the **Create Application** button.
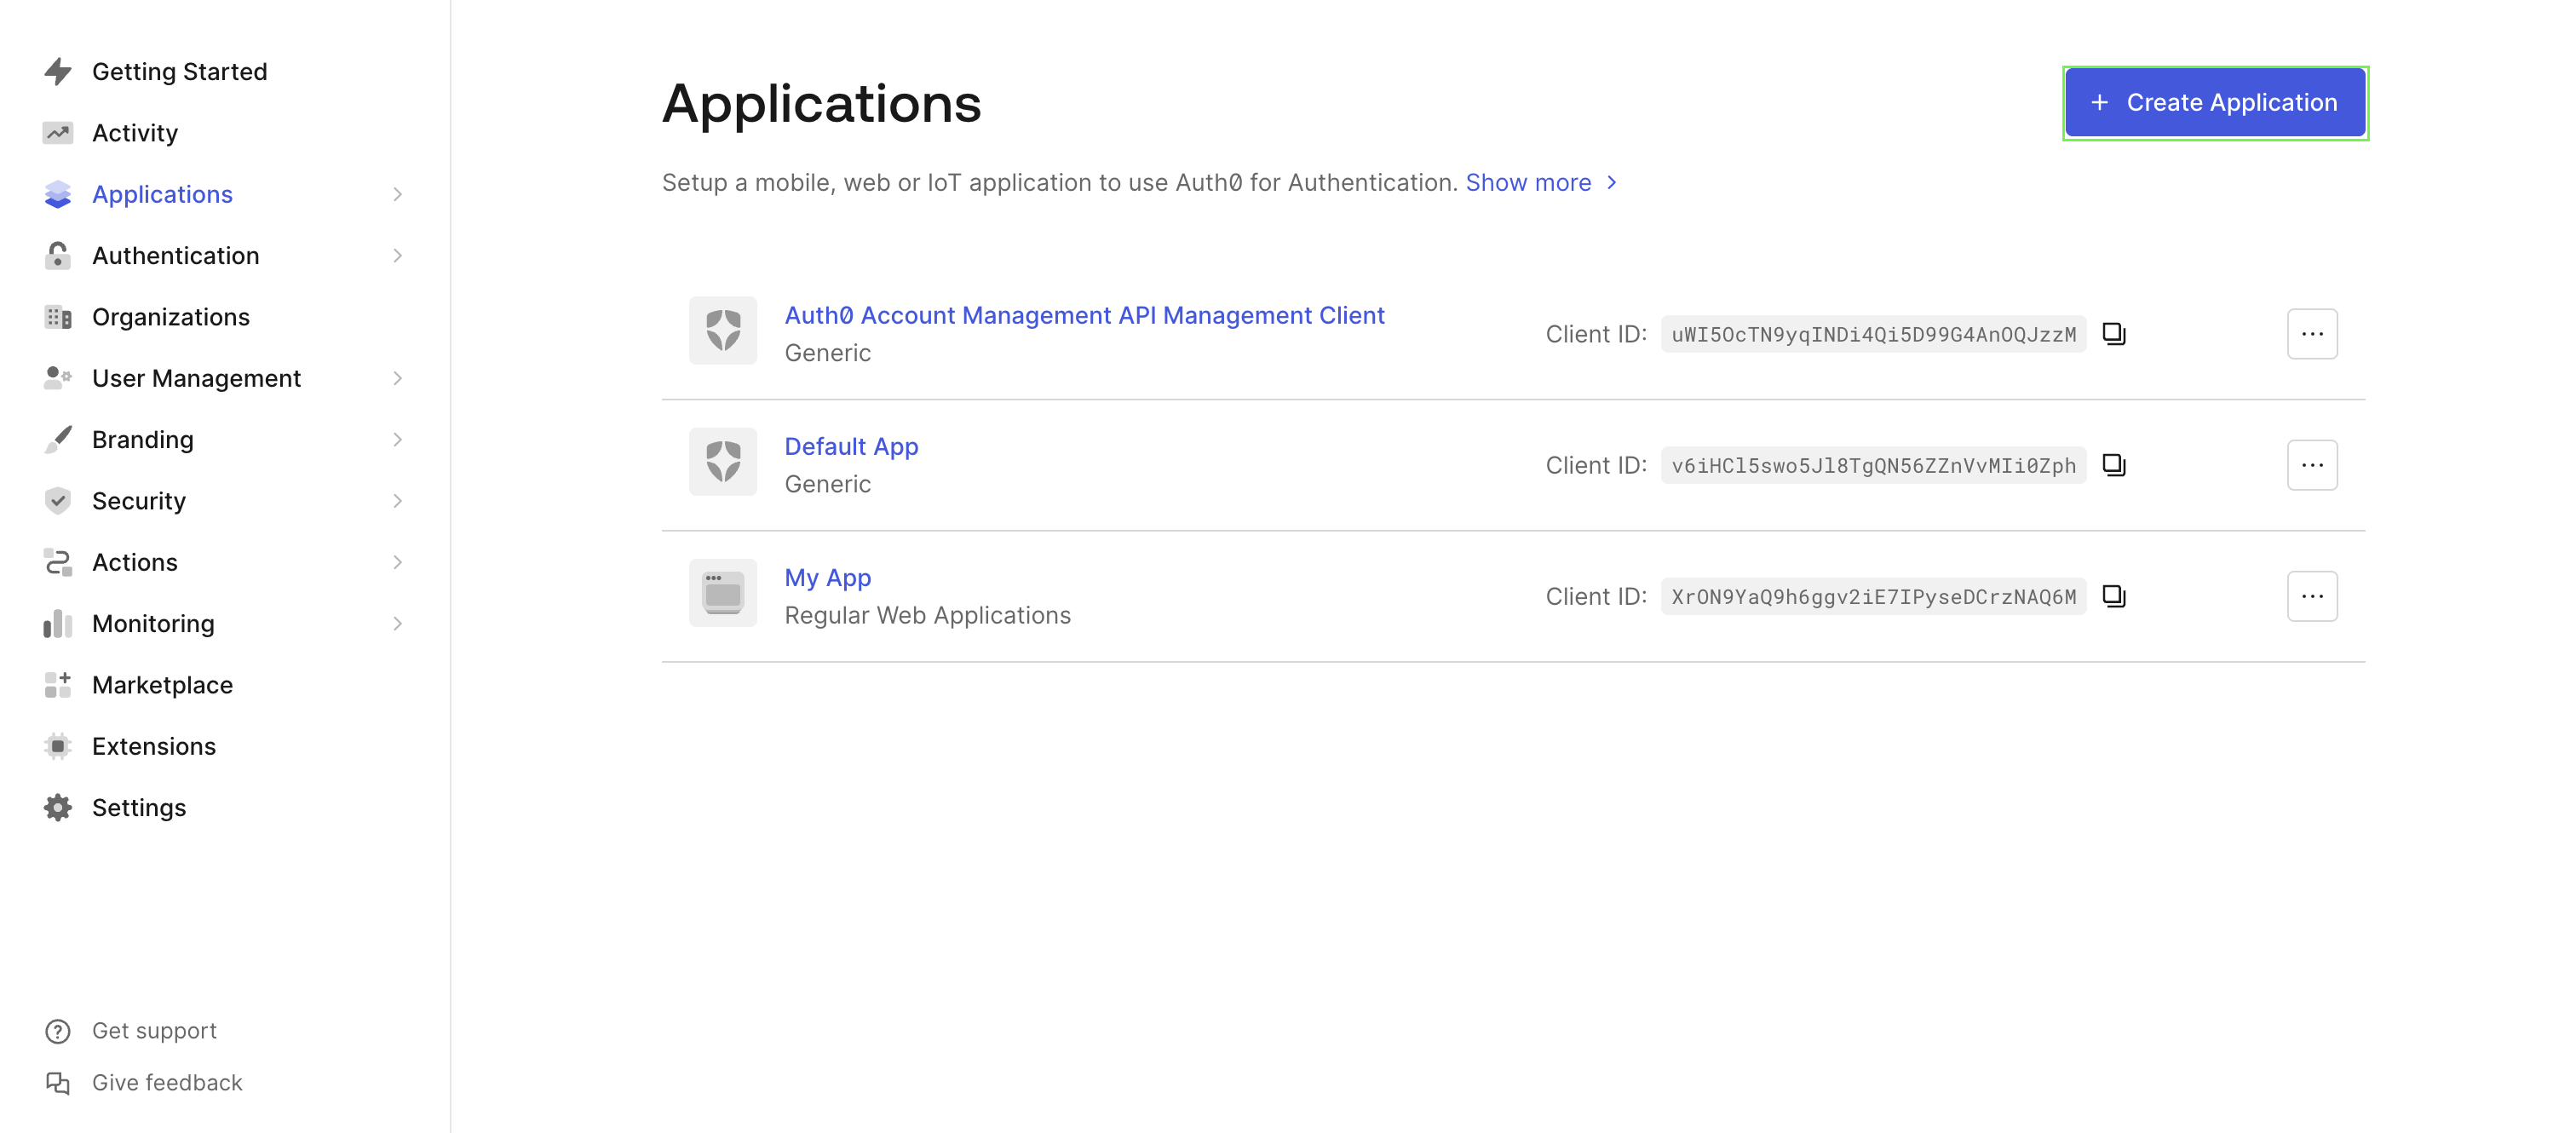 4. Add a unique name for your application and select **Machine to Machine Applications**
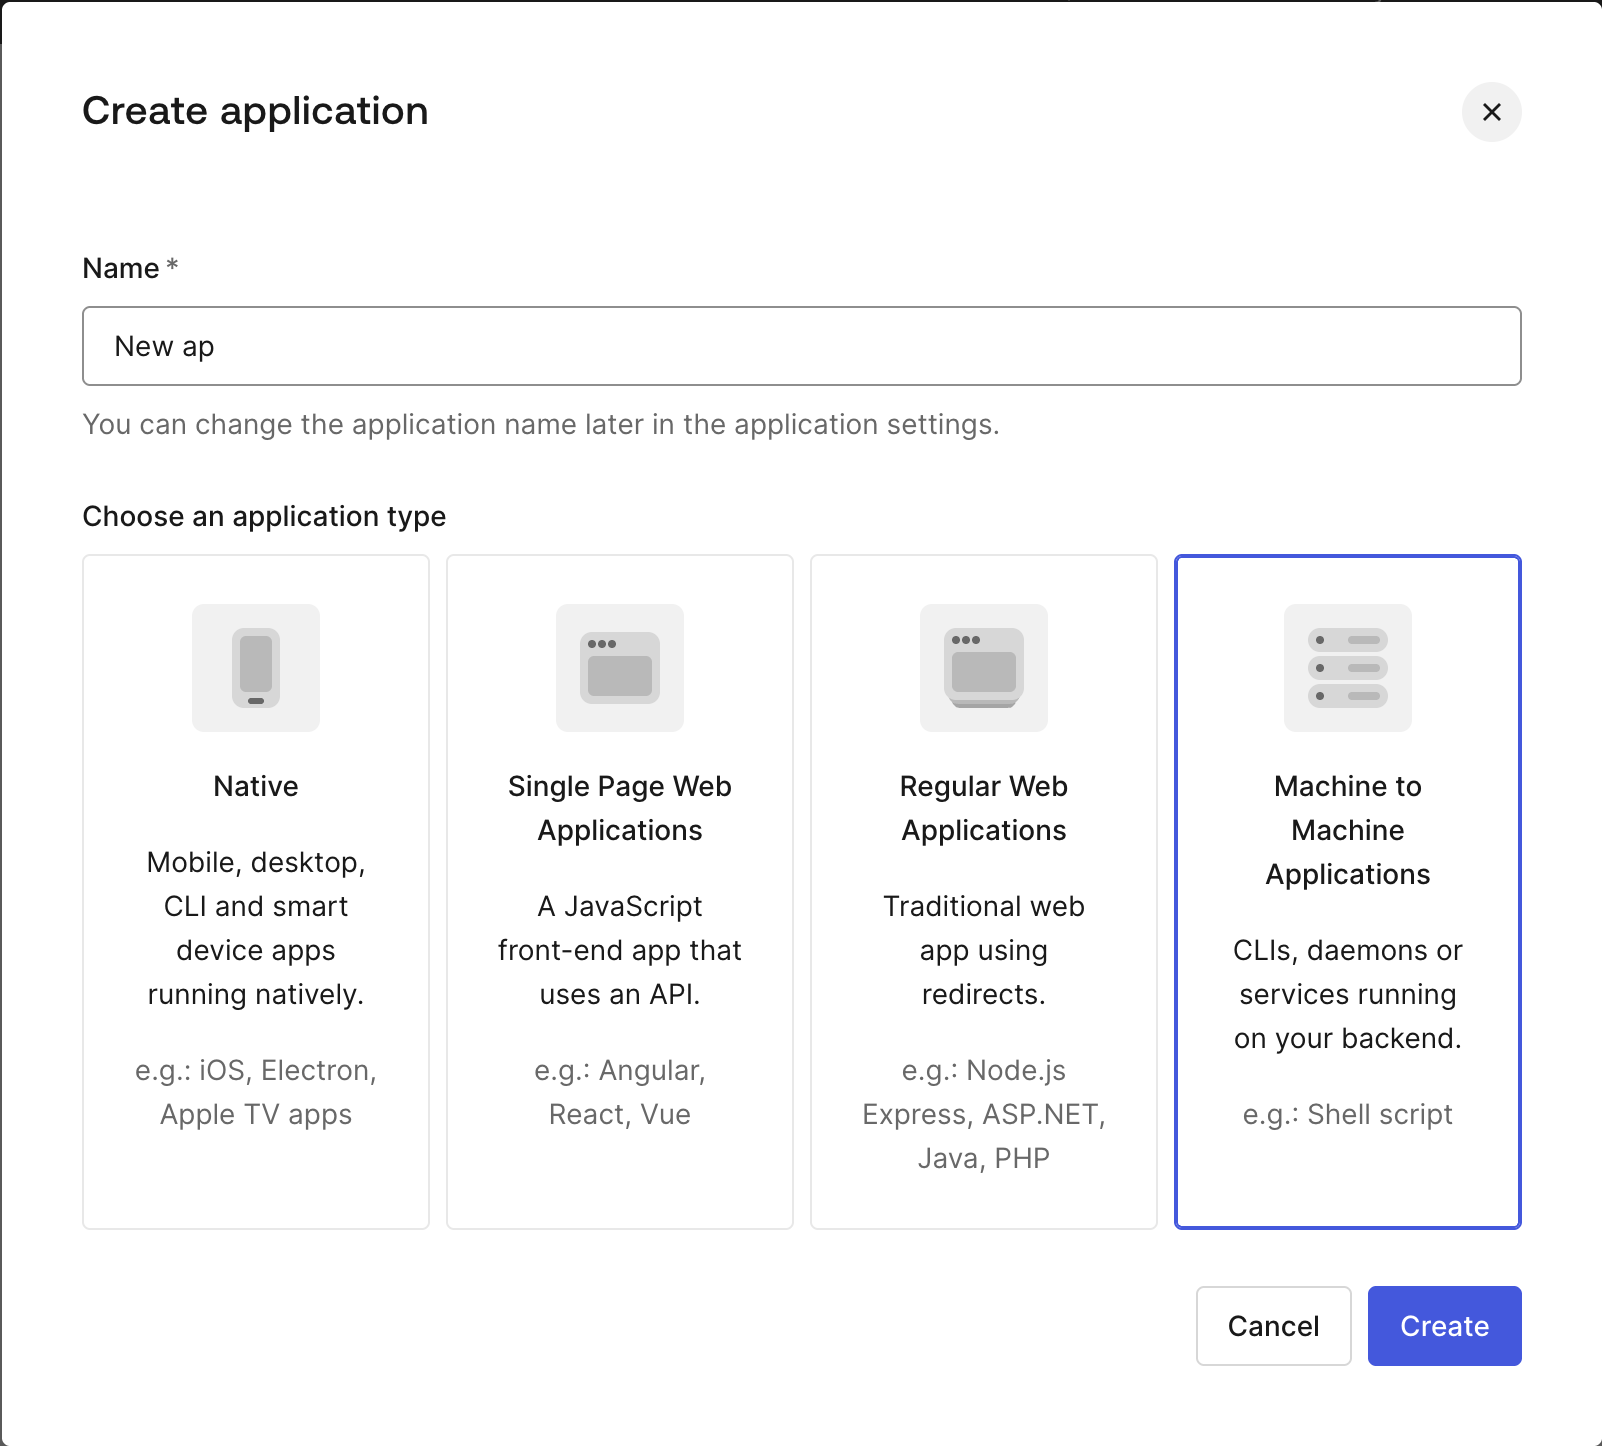 5. From the dropdown menu, select **Auth0 Management API**, then grant `read:users` and `read:logs`.
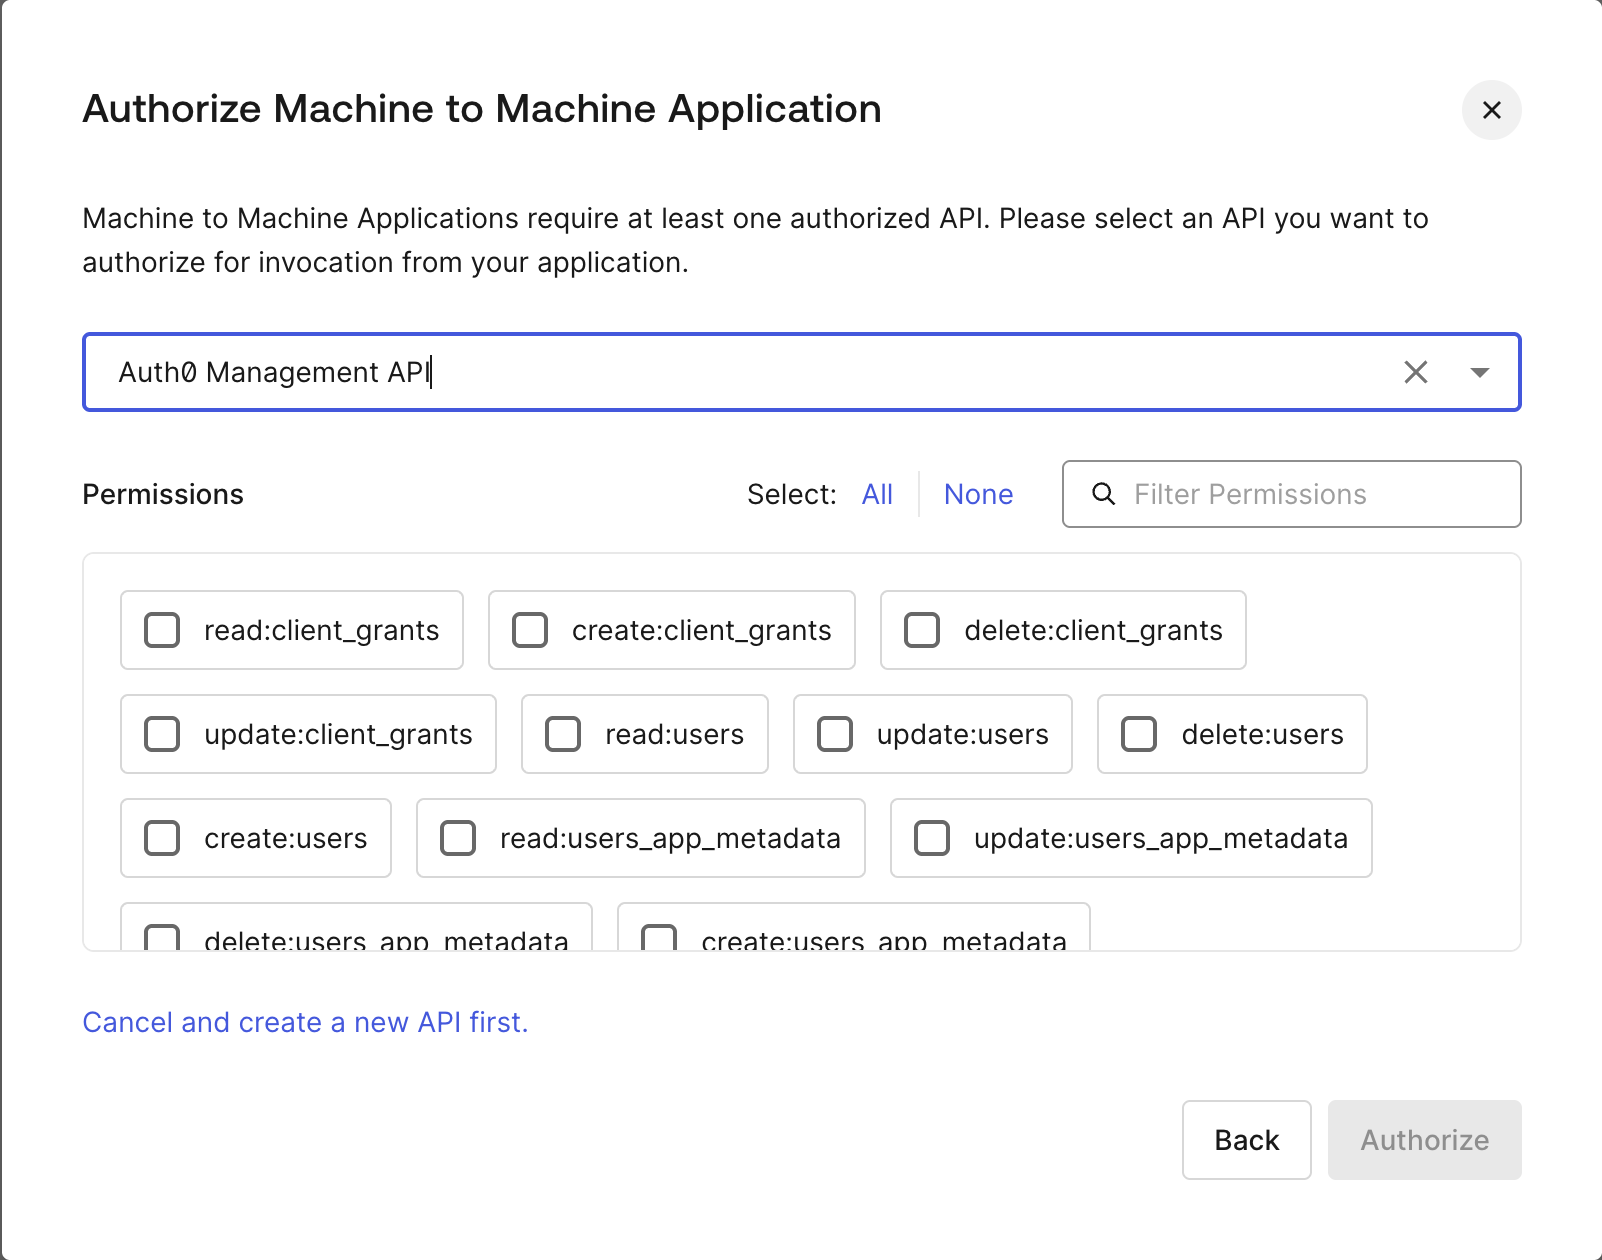 6. Click **Authorize** to create your new application.
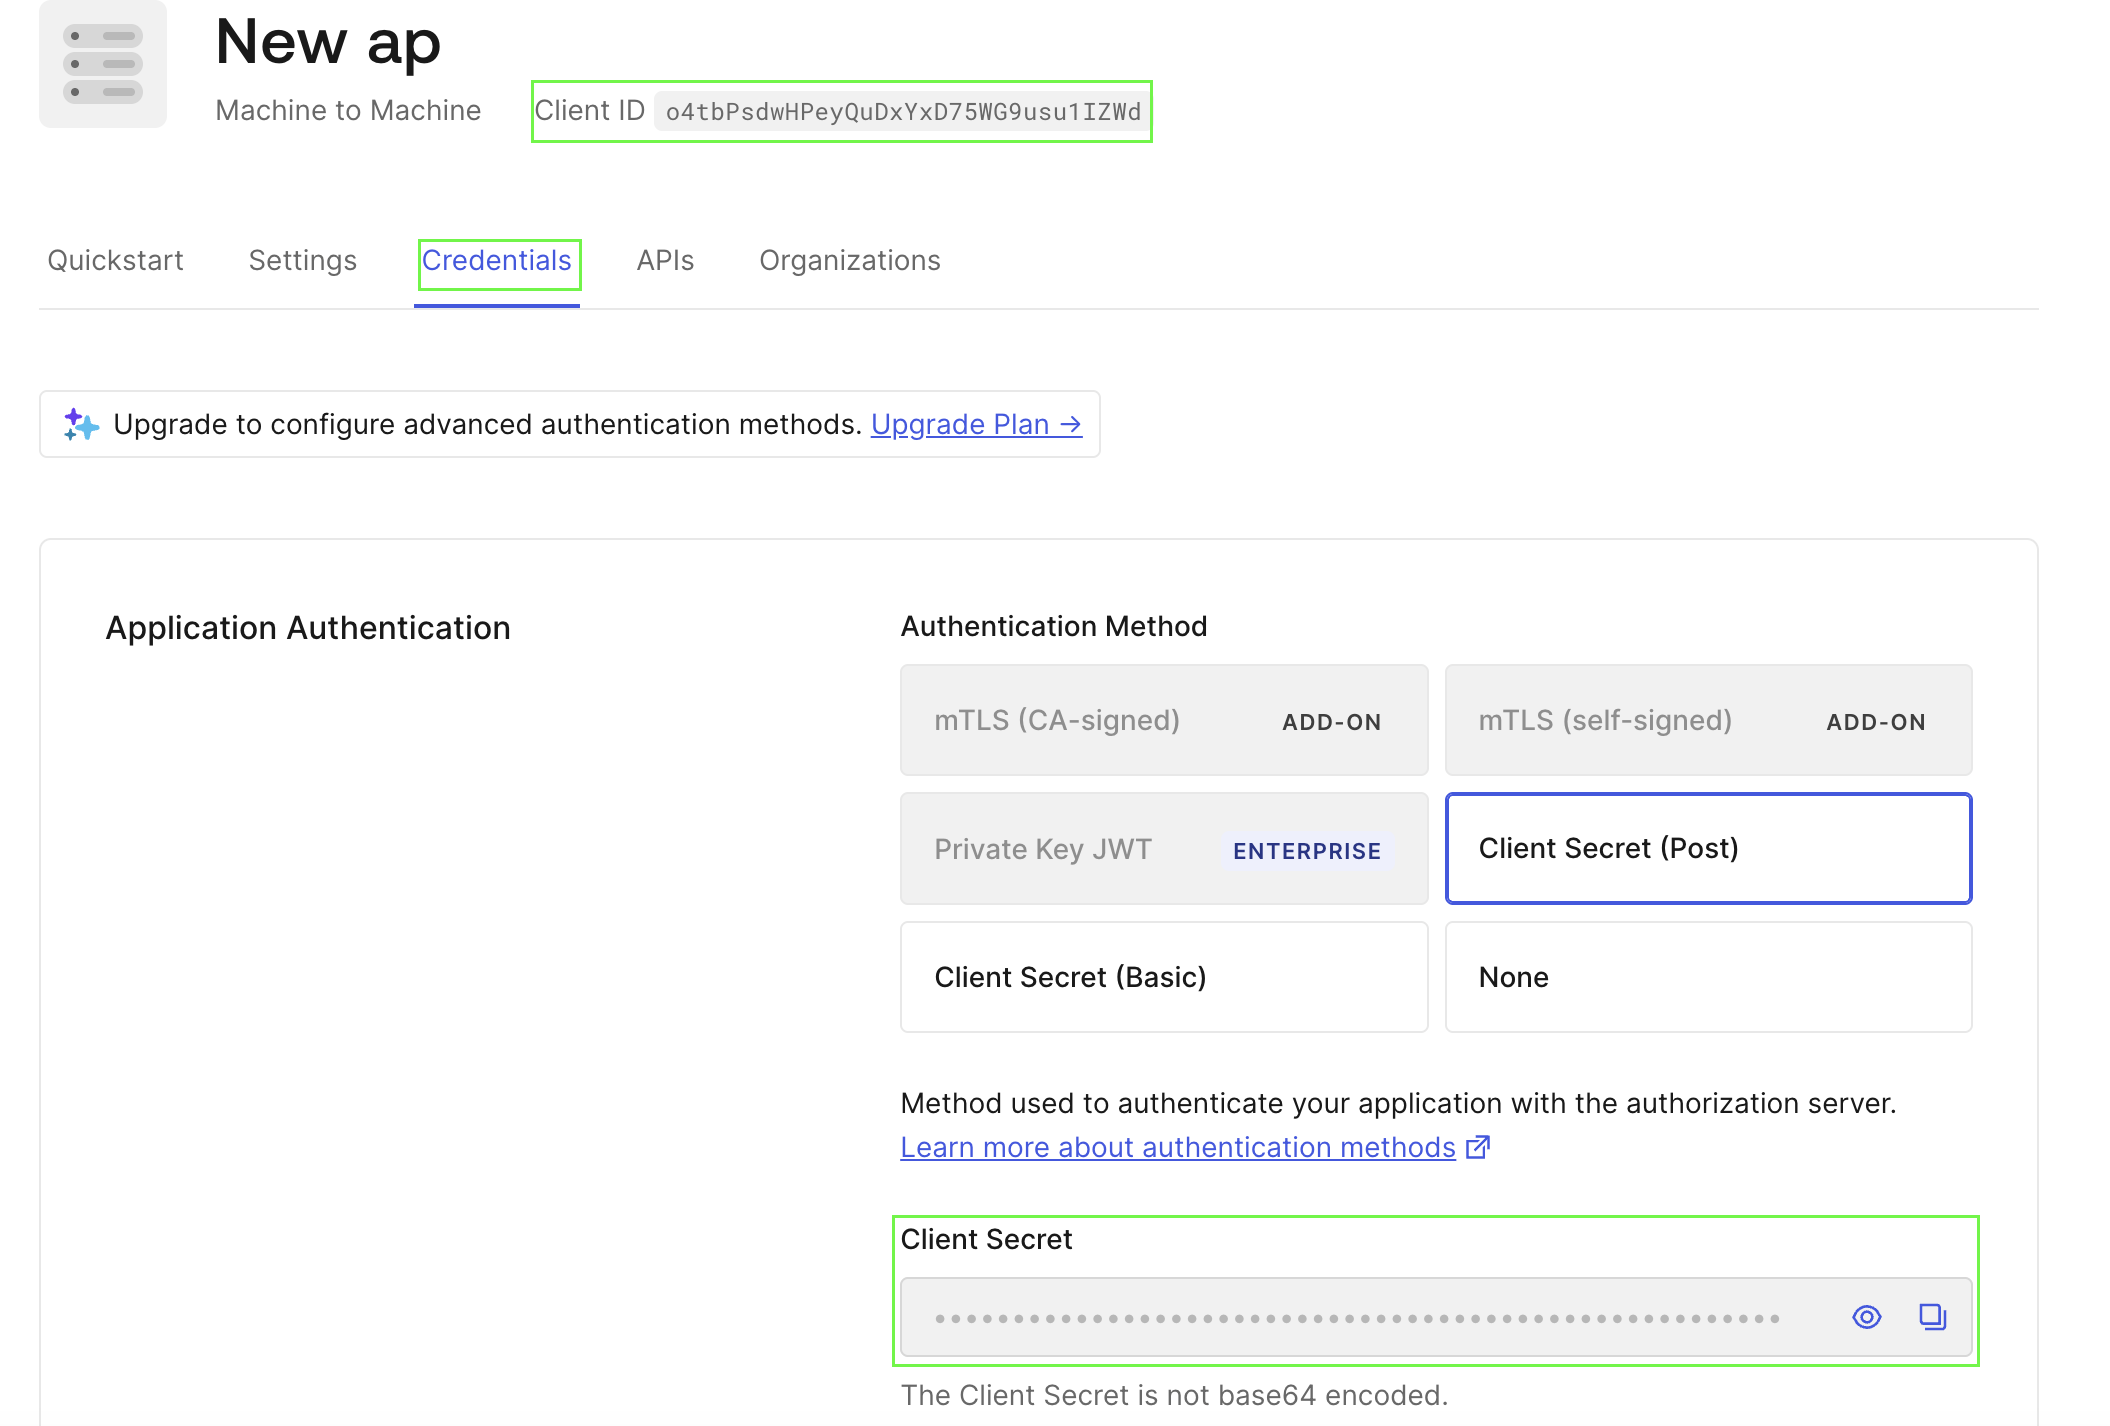
7. On the Application page, navigate to the **Credentials** section. Your **Client Secret** will be displayed here, and the **Client ID** can be found at the top of the page.
6. Click **Authorize** to create your new application.
7. On the Application page, navigate to the **Credentials** section. Your **Client Secret** will be displayed here, and the **Client ID** can be found at the top of the page.
 #### Step 2: Finding Your HostName
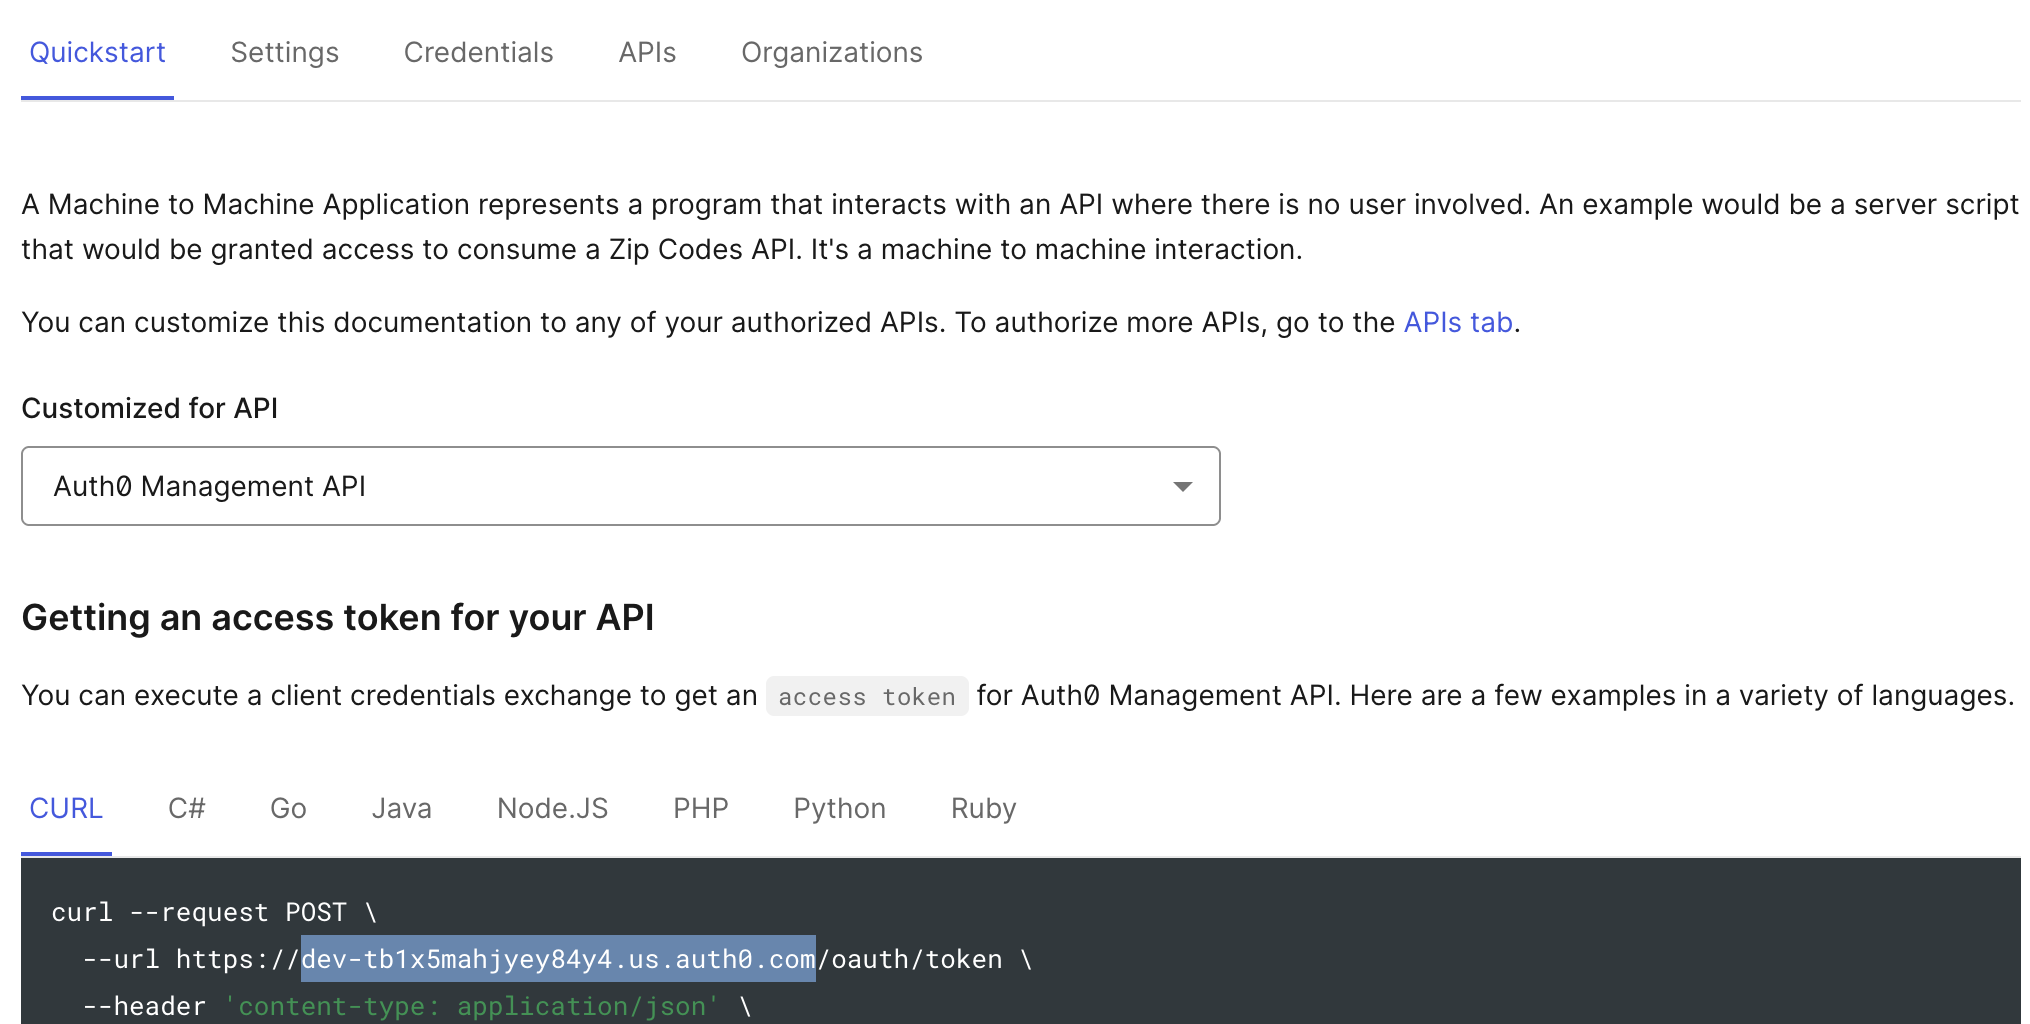
* From the **Quickstart** tab of your newly created application, Auth0 provides an example request for obtaining an access token. Your **HostName** is the text that appears after `https://` and before `/oauth/token`.
* In the example below, the HostName is `dev-tb1x5mahjyey84y4.us.auth0.com`.
#### Step 2: Finding Your HostName
* From the **Quickstart** tab of your newly created application, Auth0 provides an example request for obtaining an access token. Your **HostName** is the text that appears after `https://` and before `/oauth/token`.
* In the example below, the HostName is `dev-tb1x5mahjyey84y4.us.auth0.com`.
 #### Step 3: Finding Your Audience
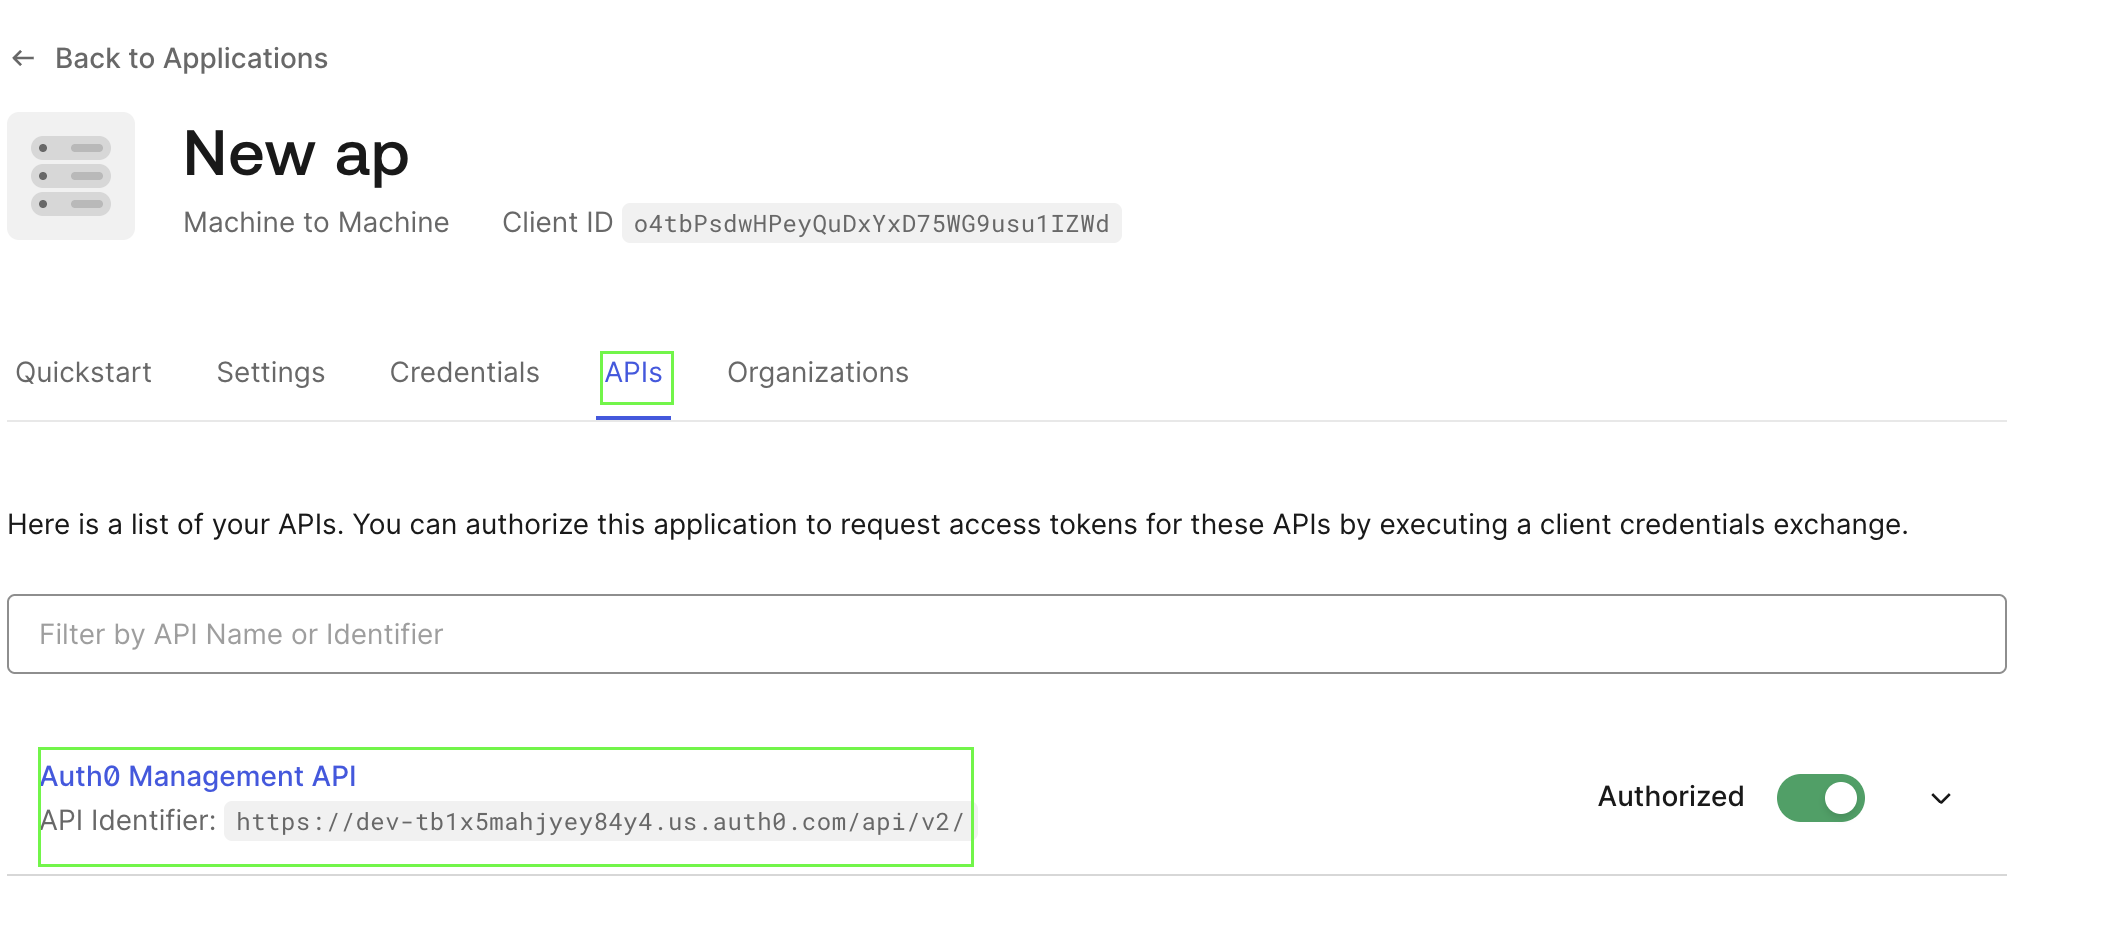
* You can find this in the **Identifier** field of your newly created application under the **APIs** tab.
#### Step 3: Finding Your Audience
* You can find this in the **Identifier** field of your newly created application under the **APIs** tab.
 #### Step 4: Finding Your Organization
* This is optional and can be obtained from the **Organizations** page of your newly created application if your tenant is configured to use **Organizations**.
#### Step 5: Enter credentials in the Living Security Platform
Once you have your **Client ID**, **Client Secret**,**HostName**, **Audience** and **Organization**:
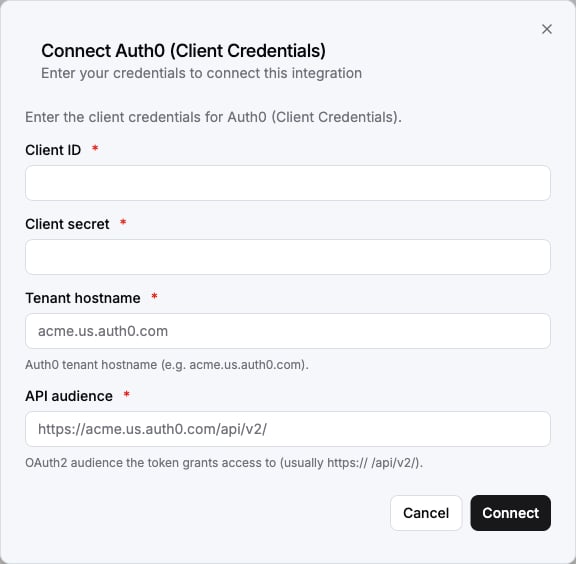
1. Open the form where you need to authenticate with Auth0 (Client Credentials).
2. Enter your **Client ID**, **Client Secret**, **HostName**, **Audience** and **Organization** in their respective fields.
3. Submit the form, and you should be successfully authenticated.
#### Step 4: Finding Your Organization
* This is optional and can be obtained from the **Organizations** page of your newly created application if your tenant is configured to use **Organizations**.
#### Step 5: Enter credentials in the Living Security Platform
Once you have your **Client ID**, **Client Secret**,**HostName**, **Audience** and **Organization**:
1. Open the form where you need to authenticate with Auth0 (Client Credentials).
2. Enter your **Client ID**, **Client Secret**, **HostName**, **Audience** and **Organization** in their respective fields.
3. Submit the form, and you should be successfully authenticated.
 You are now connected to Auth0 (Client Credentials).
***
Portions of this documentation are adapted from [Nango](https://nango.dev/docs/), used under the [Elastic License 2.0](https://github.com/NangoHQ/nango?tab=License-1-ov-file#readme).
## Network access
Skip this section unless your Auth0 tenant restricts Management API access by source IP address. Most tenants do not.
You are now connected to Auth0 (Client Credentials).
***
Portions of this documentation are adapted from [Nango](https://nango.dev/docs/), used under the [Elastic License 2.0](https://github.com/NangoHQ/nango?tab=License-1-ov-file#readme).
## Network access
Skip this section unless your Auth0 tenant restricts Management API access by source IP address. Most tenants do not.