> ## Documentation Index
> Fetch the complete documentation index at: https://docs.livingsecurity.com/llms.txt
> Use this file to discover all available pages before exploring further.
# Abnormal Security integration setup
> Connect Abnormal Security to import email threat and phishing campaign data.
export const PublicIntegrationNextSteps = () => <>
Related resources
;
export const EgressIpSafelist = ({system}) =>
Add all four Living Security sync egress IP addresses to the allowlist in{' '}
{system}. Enter each as a single host with /32 if {system} expects CIDR notation:
52.34.139.153/32, 54.69.127.183/32, 44.247.133.183/32,{' '}
52.26.211.56/32
Traffic can leave from any of the four, so allowlisting only some of them causes intermittent
sync failures. These four are the same in every Living Security region. See{' '}
Configuring Integration Egress IP Addresses
{' '}
for the full list, change policy, and troubleshooting.
;
export const ConnectInPlatform = ({tile, children}) =>
Completed by whoever holds Living Security access — the program owner, or the system
admin if they've been invited (delegated setup).
-
Go to Settings → Integrations → Catalog, find the{' '}
{tile} tile, click Connect.
-
Fill in the fields below, then click Connect.
{children}
;
export const SystemAdminBanner = ({system, recommendDelegated}) =>
This guide is for your {system} administrator. It covers creating API
credentials inside {system}, which requires admin access to {system} — not to the
Living Security Platform.
If you're the Living Security program owner and don't administer {system},
send this page to whoever does. They complete Part A and hand the credentials back to you
(or enter them directly if you've invited them into the platform).
{recommendDelegated && <>
{' '}Because setup produces sensitive key material, we recommend the{' '}
delegated setup path so the secret is never sent back to you.
}
;
## What this integration contributes
Abnormal Security can contribute normalized email threat, delivery, blocking, and employee-reporting activity. Reviewed examples include:
* `phishing.real.blocked` — real phishing blocked before delivery
* `phishing.real.delivered` — real phishing delivered to the inbox
* `phishing.real.reported` — reports real phishing emails
These examples show the types of normalized activity Living Security can use. See [how integration data becomes signals](/signals/data-sources).
## What Living Security needs
| Credential | Description |
| --------------------- | ---------------------------------------------------------- |
| **API key** | A REST API bearer token generated from the Abnormal Portal |
| **Regional API host** | The hostname for your Abnormal Security environment |
**Scopes:** Custom Access with **Read** on `Abuse Campaigns (AI Security Mailbox)` and `Threats`
**Required role:** **Security Admin** or **Super Admin** in Abnormal Security
### Prerequisites
* You must have **Security Admin** or **Super Admin** access in Abnormal Security to create and manage API tokens.
***
## Part A — In Abnormal Security
*Your Abnormal Security administrator completes these steps.*
1. Sign in to your Abnormal Security portal.
2. In the left navigation, click **Settings**, then select **Integrations**.
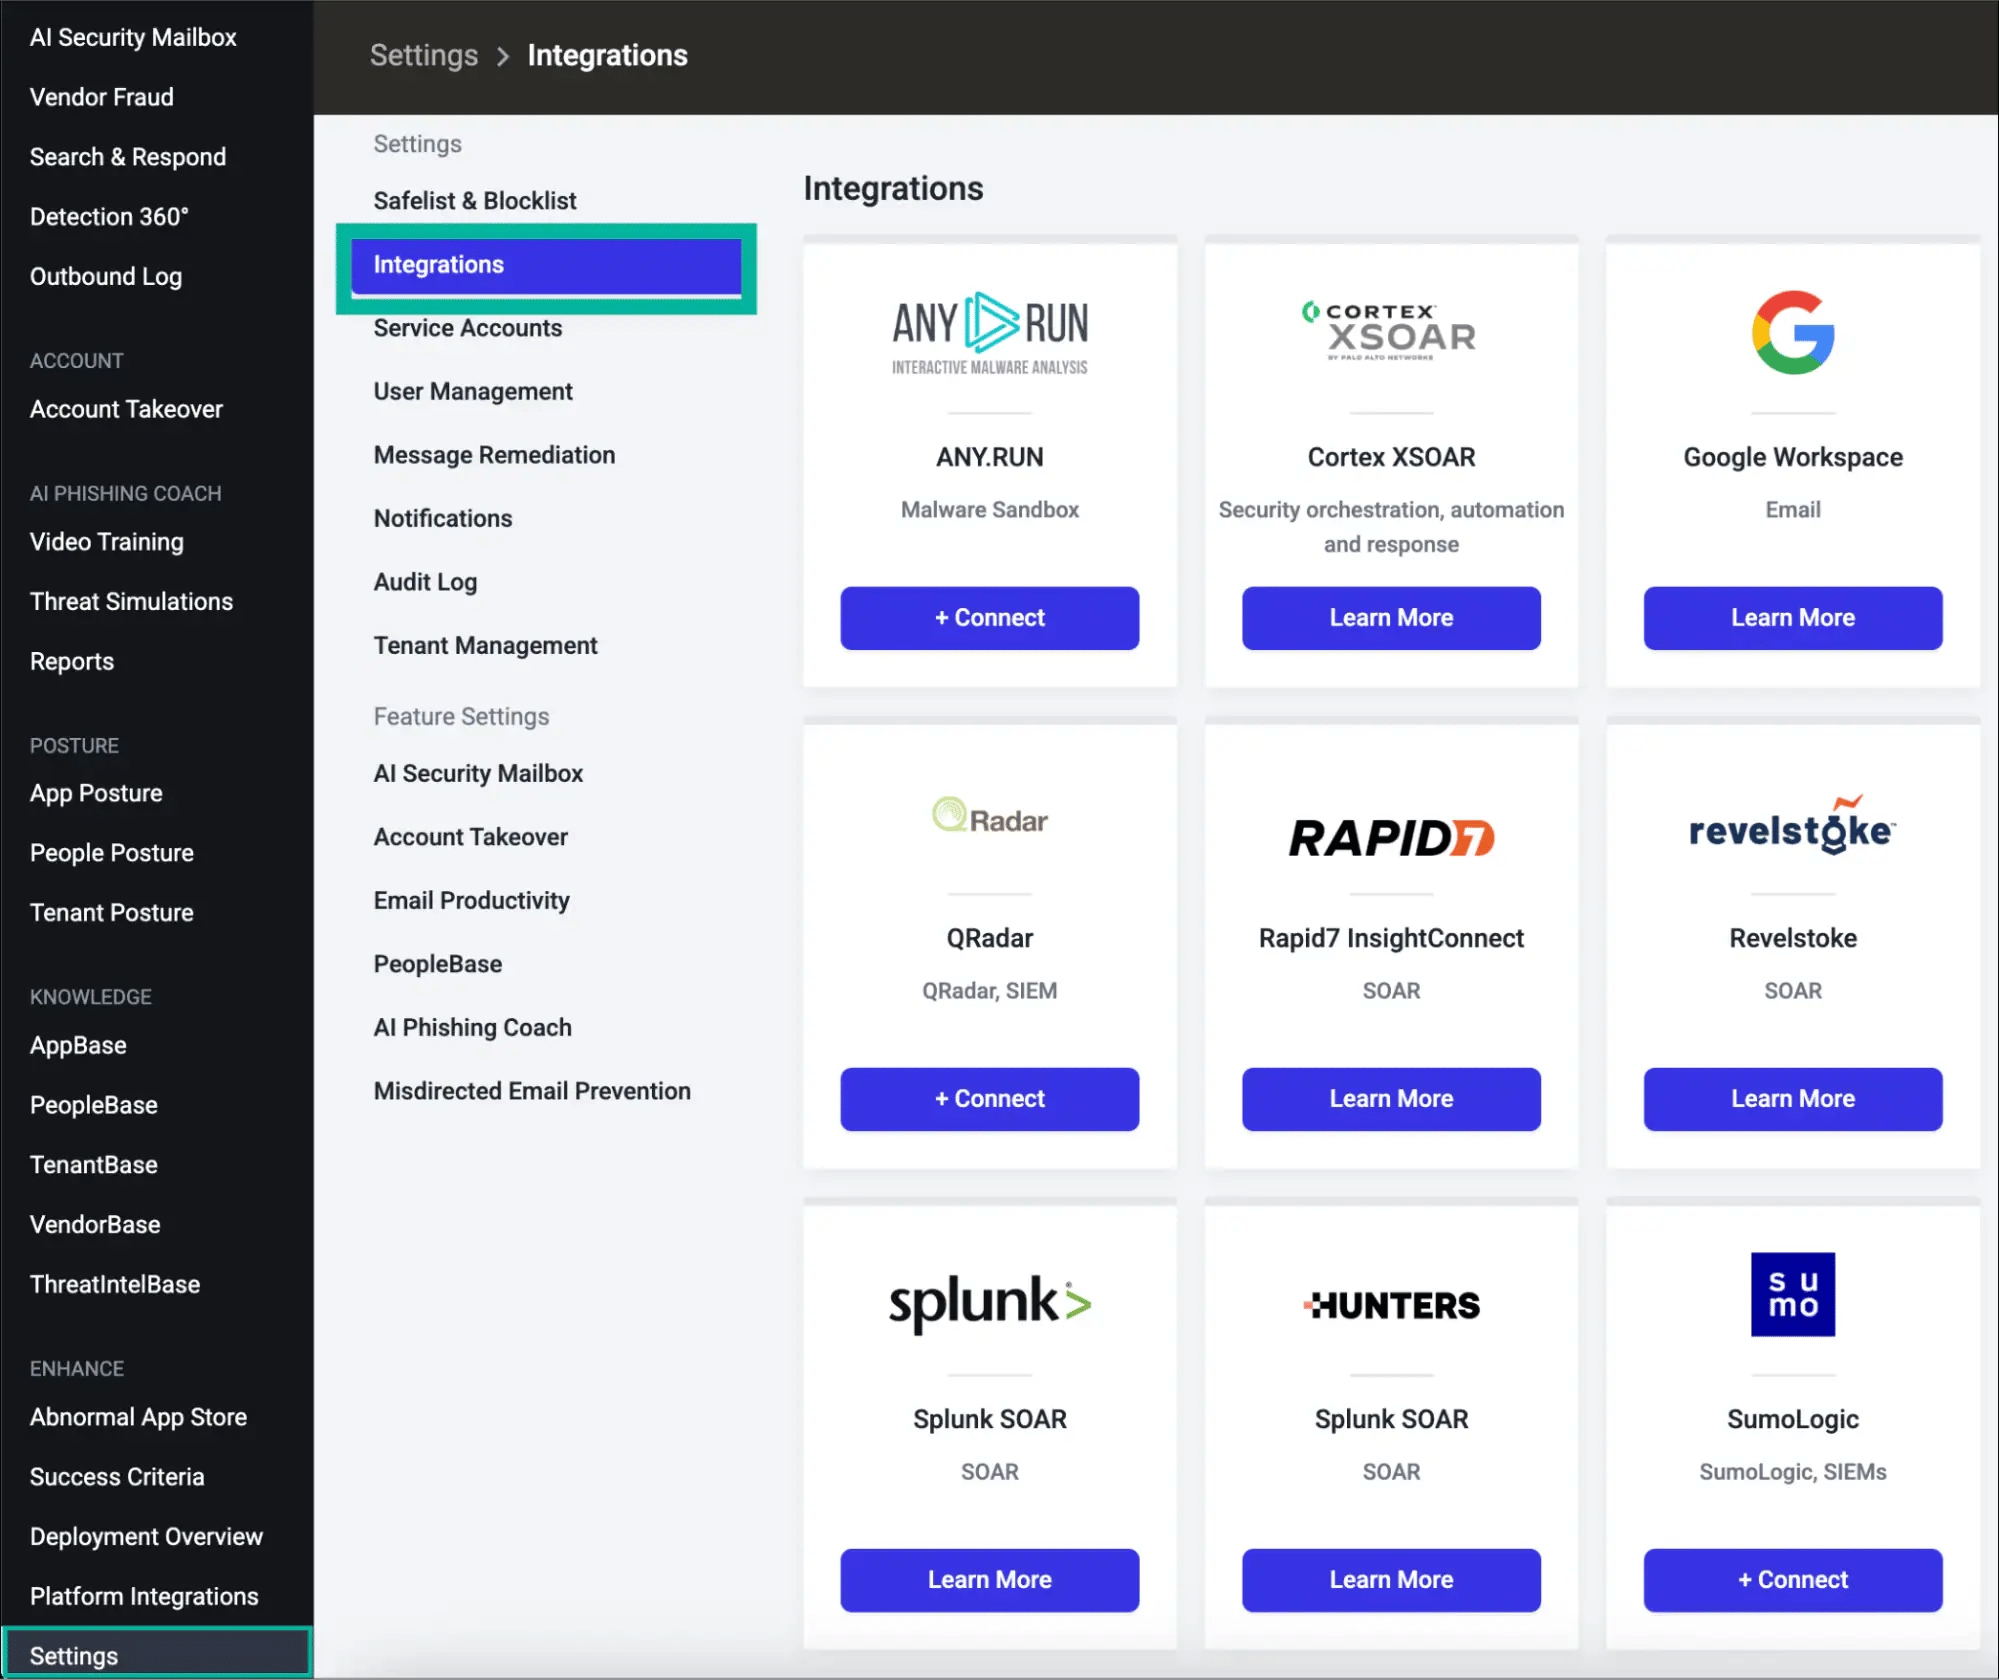 3. Scroll down to the **API Token Management** section at the bottom of the Integrations page.
4. Click **+ Create New Token**.
3. Scroll down to the **API Token Management** section at the bottom of the Integrations page.
4. Click **+ Create New Token**.
 Select **REST API** as the integration type, then click **Next**.
Choose a token scope, then click **Next**:
* **Customer (All Current and Future Tenants)** — Use this if your Abnormal account manages multiple tenants. This token covers all current and future tenants automatically.
* **Tenant (Single Tenant)** — Use this to isolate the token to a single specific tenant.
For most organizations with a single Abnormal tenant, either option works. When in doubt, select **Customer**.
Select **Custom Access** and enable **Read** for both endpoint groups:
| Endpoint group | Required access level |
| ----------------------------------------- | --------------------- |
| **Abuse Campaigns (AI Security Mailbox)** | Read |
| **Threats** | Read |
Then click **Next**.
**Read** access returns non-sensitive threat and campaign data. **Read Sensitive** additionally exposes PII, attachments, and employee data. **Write** submits remediation actions. Grant only **Read** unless your use case specifically requires more.
Fill in the following fields:
* **Token Name** — A descriptive name (e.g., `Living Security Platform`)
* **Description** — Optional context (e.g., `Read access for Living Security HRM platform`)
* **Token Expiry** — Choose **90**, **180**, or **365 days** to match your rotation policy. Set a calendar reminder to rotate the token before it expires.
* **IP Safelist** — Enter the Living Security egress IP ranges, one per entry. Click **Add** after each.
**The IP safelist is mandatory.** Abnormal Security rejects all API requests from addresses not on the safelist. The connection dialog will succeed, but data syncs will fail with `401 Unauthorized` until the correct IPs are safelisted.
Then click **Next**.
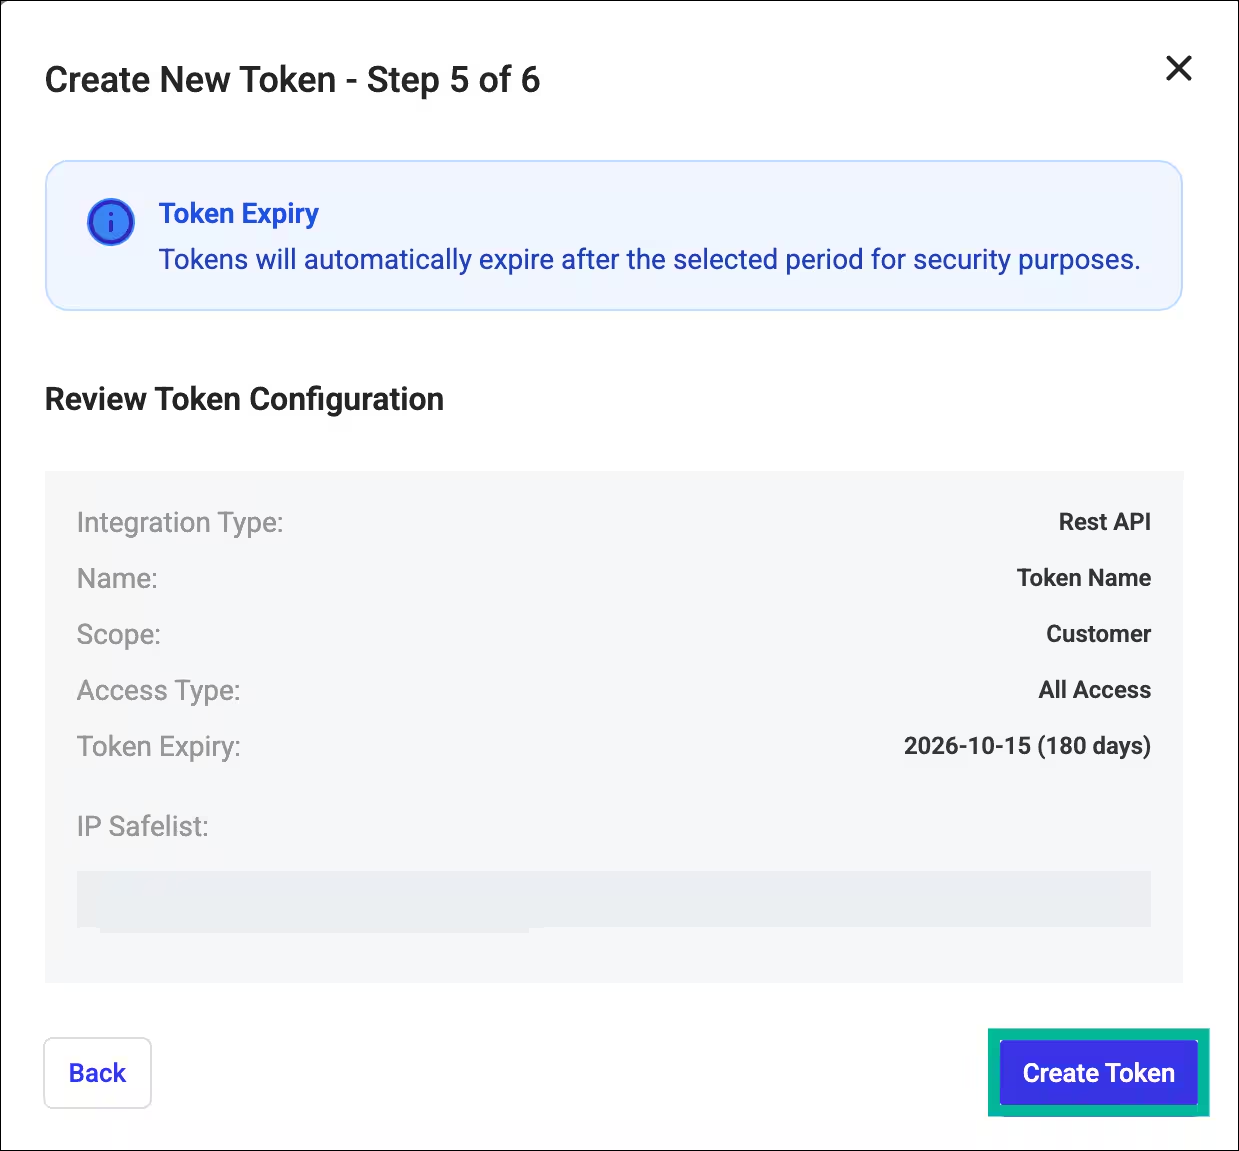
Review your token configuration summary, then click **Create Token**.
Select **REST API** as the integration type, then click **Next**.
Choose a token scope, then click **Next**:
* **Customer (All Current and Future Tenants)** — Use this if your Abnormal account manages multiple tenants. This token covers all current and future tenants automatically.
* **Tenant (Single Tenant)** — Use this to isolate the token to a single specific tenant.
For most organizations with a single Abnormal tenant, either option works. When in doubt, select **Customer**.
Select **Custom Access** and enable **Read** for both endpoint groups:
| Endpoint group | Required access level |
| ----------------------------------------- | --------------------- |
| **Abuse Campaigns (AI Security Mailbox)** | Read |
| **Threats** | Read |
Then click **Next**.
**Read** access returns non-sensitive threat and campaign data. **Read Sensitive** additionally exposes PII, attachments, and employee data. **Write** submits remediation actions. Grant only **Read** unless your use case specifically requires more.
Fill in the following fields:
* **Token Name** — A descriptive name (e.g., `Living Security Platform`)
* **Description** — Optional context (e.g., `Read access for Living Security HRM platform`)
* **Token Expiry** — Choose **90**, **180**, or **365 days** to match your rotation policy. Set a calendar reminder to rotate the token before it expires.
* **IP Safelist** — Enter the Living Security egress IP ranges, one per entry. Click **Add** after each.
**The IP safelist is mandatory.** Abnormal Security rejects all API requests from addresses not on the safelist. The connection dialog will succeed, but data syncs will fail with `401 Unauthorized` until the correct IPs are safelisted.
Then click **Next**.
Review your token configuration summary, then click **Create Token**.
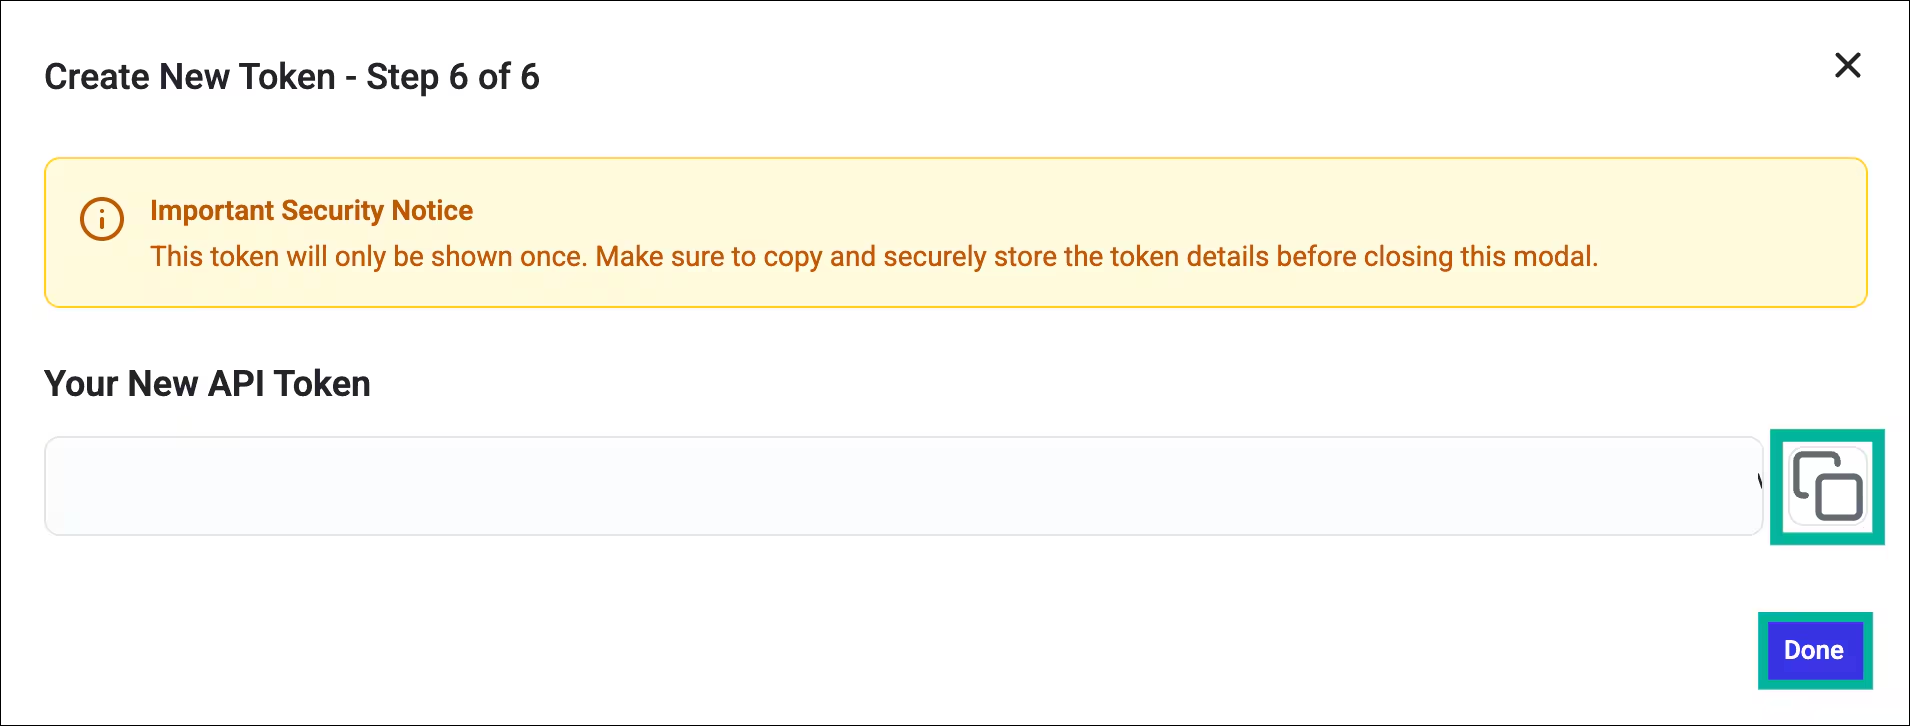 **Copy the token immediately** and store it in a secure location (e.g., a password vault or secrets manager), then click **Done**.
 The Abnormal Portal displays the token value **only once**. If you navigate away without copying it, you must create a new token and revoke the old one.
Determine the correct API host for your Abnormal Security environment:
| Environment | Regional API host |
| ----------------------- | ------------------------------ |
| Default (US commercial) | `api.abnormalplatform.com` |
| EU | `eu.rest.abnormalsecurity.com` |
| FedRAMP | `rest.abnormalsecurity.us` |
Enter the **host only** — no `https://` prefix and no trailing slash.
If you're unsure which environment your organization uses, check your Abnormal portal URL or contact your Abnormal Security account team.
***
## Part B — In the Living Security Platform
*The program owner completes this step, or the system admin if using delegated setup.*
| Field | Value |
| --------------------- | --------------------------------------------------------------------- |
| **API key** | The token copied in Part A, Step 7 |
| **Regional API host** | The host from Part A, Step 8 (US default: `api.abnormalplatform.com`) |
The Abnormal Portal displays the token value **only once**. If you navigate away without copying it, you must create a new token and revoke the old one.
Determine the correct API host for your Abnormal Security environment:
| Environment | Regional API host |
| ----------------------- | ------------------------------ |
| Default (US commercial) | `api.abnormalplatform.com` |
| EU | `eu.rest.abnormalsecurity.com` |
| FedRAMP | `rest.abnormalsecurity.us` |
Enter the **host only** — no `https://` prefix and no trailing slash.
If you're unsure which environment your organization uses, check your Abnormal portal URL or contact your Abnormal Security account team.
***
## Part B — In the Living Security Platform
*The program owner completes this step, or the system admin if using delegated setup.*
| Field | Value |
| --------------------- | --------------------------------------------------------------------- |
| **API key** | The token copied in Part A, Step 7 |
| **Regional API host** | The host from Part A, Step 8 (US default: `api.abnormalplatform.com`) |
 You are now connected to Abnormal Security.
***
## Troubleshooting
The token is missing one or both required access grants (**Abuse Campaigns** or **Threats**). Integration type, scope, and access level cannot be changed after token creation — you must create a new token with the correct settings and revoke the old one.
Either the token is invalid/expired, or the request IP is not on the safelist. Check:
1. Token has not been revoked or expired
2. All four [Living Security egress IP addresses](/integrations/managing/egress-ip-addresses) are on the safelist
If syncs previously worked but now fail with `401`, the egress IP addresses may have changed — check [Configuring Integration Egress IP Addresses](/integrations/managing/egress-ip-addresses) and verify the safelist matches.
If your organization has API tokens created before the self-service Token Management experience was introduced, they appear as **Legacy** in the dashboard. Legacy tokens continue to work but cannot be rotated — only their IP safelist can be updated. All legacy tokens expire automatically on **April 30, 2027**. Plan to replace legacy tokens with new tokens before that date.
You are now connected to Abnormal Security.
***
## Troubleshooting
The token is missing one or both required access grants (**Abuse Campaigns** or **Threats**). Integration type, scope, and access level cannot be changed after token creation — you must create a new token with the correct settings and revoke the old one.
Either the token is invalid/expired, or the request IP is not on the safelist. Check:
1. Token has not been revoked or expired
2. All four [Living Security egress IP addresses](/integrations/managing/egress-ip-addresses) are on the safelist
If syncs previously worked but now fail with `401`, the egress IP addresses may have changed — check [Configuring Integration Egress IP Addresses](/integrations/managing/egress-ip-addresses) and verify the safelist matches.
If your organization has API tokens created before the self-service Token Management experience was introduced, they appear as **Legacy** in the dashboard. Legacy tokens continue to work but cannot be rotated — only their IP safelist can be updated. All legacy tokens expire automatically on **April 30, 2027**. Plan to replace legacy tokens with new tokens before that date.